Setting Up Approval Workflow
Last updated: May 3, 2026
Creating a 3-Level Approval Workflow
This document outlines how to create, configure, activate, and use a 3-level approval workflow, and how to verify its application within a new cycle.
Step 1: Start Workflow Creation and Define Basic Settings
Click Create Workflow to begin setting up a new workflow. Enter "3-level Workflow" as the workflow name, provide a clear and detailed description of the process, and set the number of approval levels to three. When all fields are correctly filled in, click Next Step to proceed.

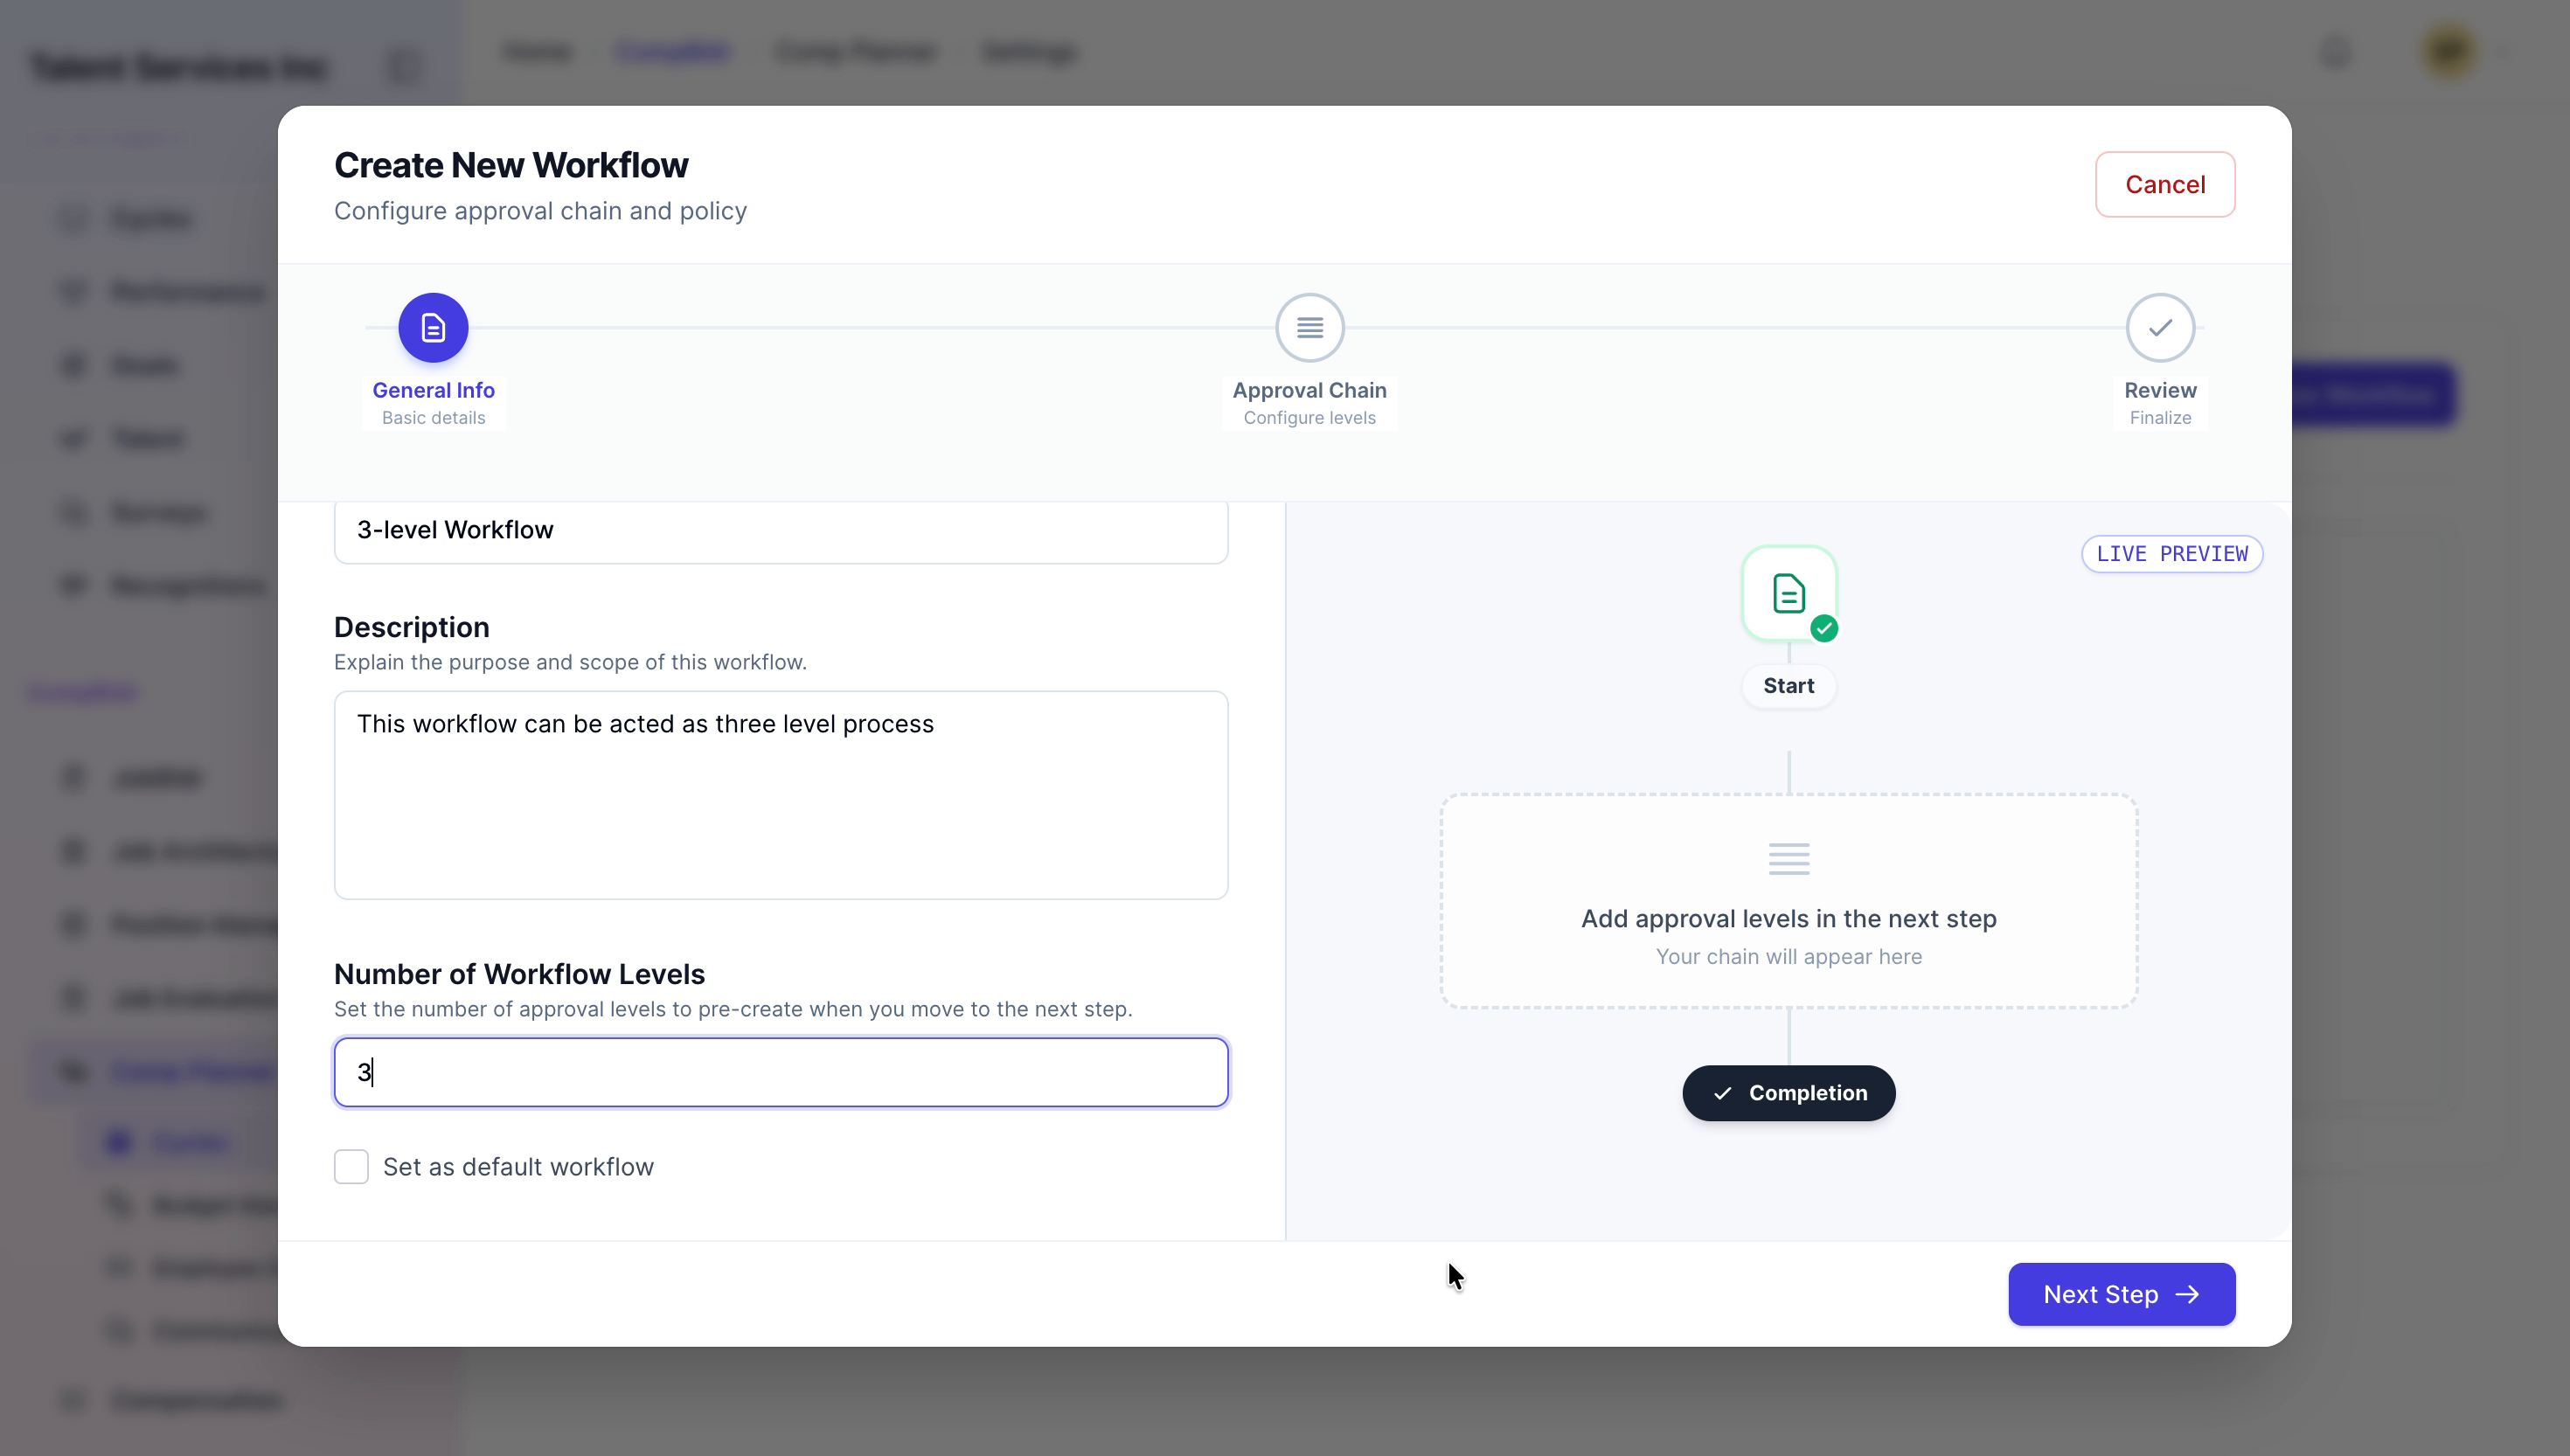
Step 2: Configure the Approval Chain Levels
In the Approval Chain configuration screen, rename the three levels to Manager, Team Head, and Unit Head. For each level, verify that the correct roles or approver groups are assigned, ensuring that each stage of the approval chain matches your organizational hierarchy and responsibilities.


Step 3: Activate the Workflow and Confirm Its Creation
Review the workflow essentials (name, description, number of levels, and assigned roles) to ensure everything is accurate. When you are satisfied, click Activate Workflow. After activation, go to the workflow settings list and confirm that the new 3-level Workflow entry appears and is marked as active.


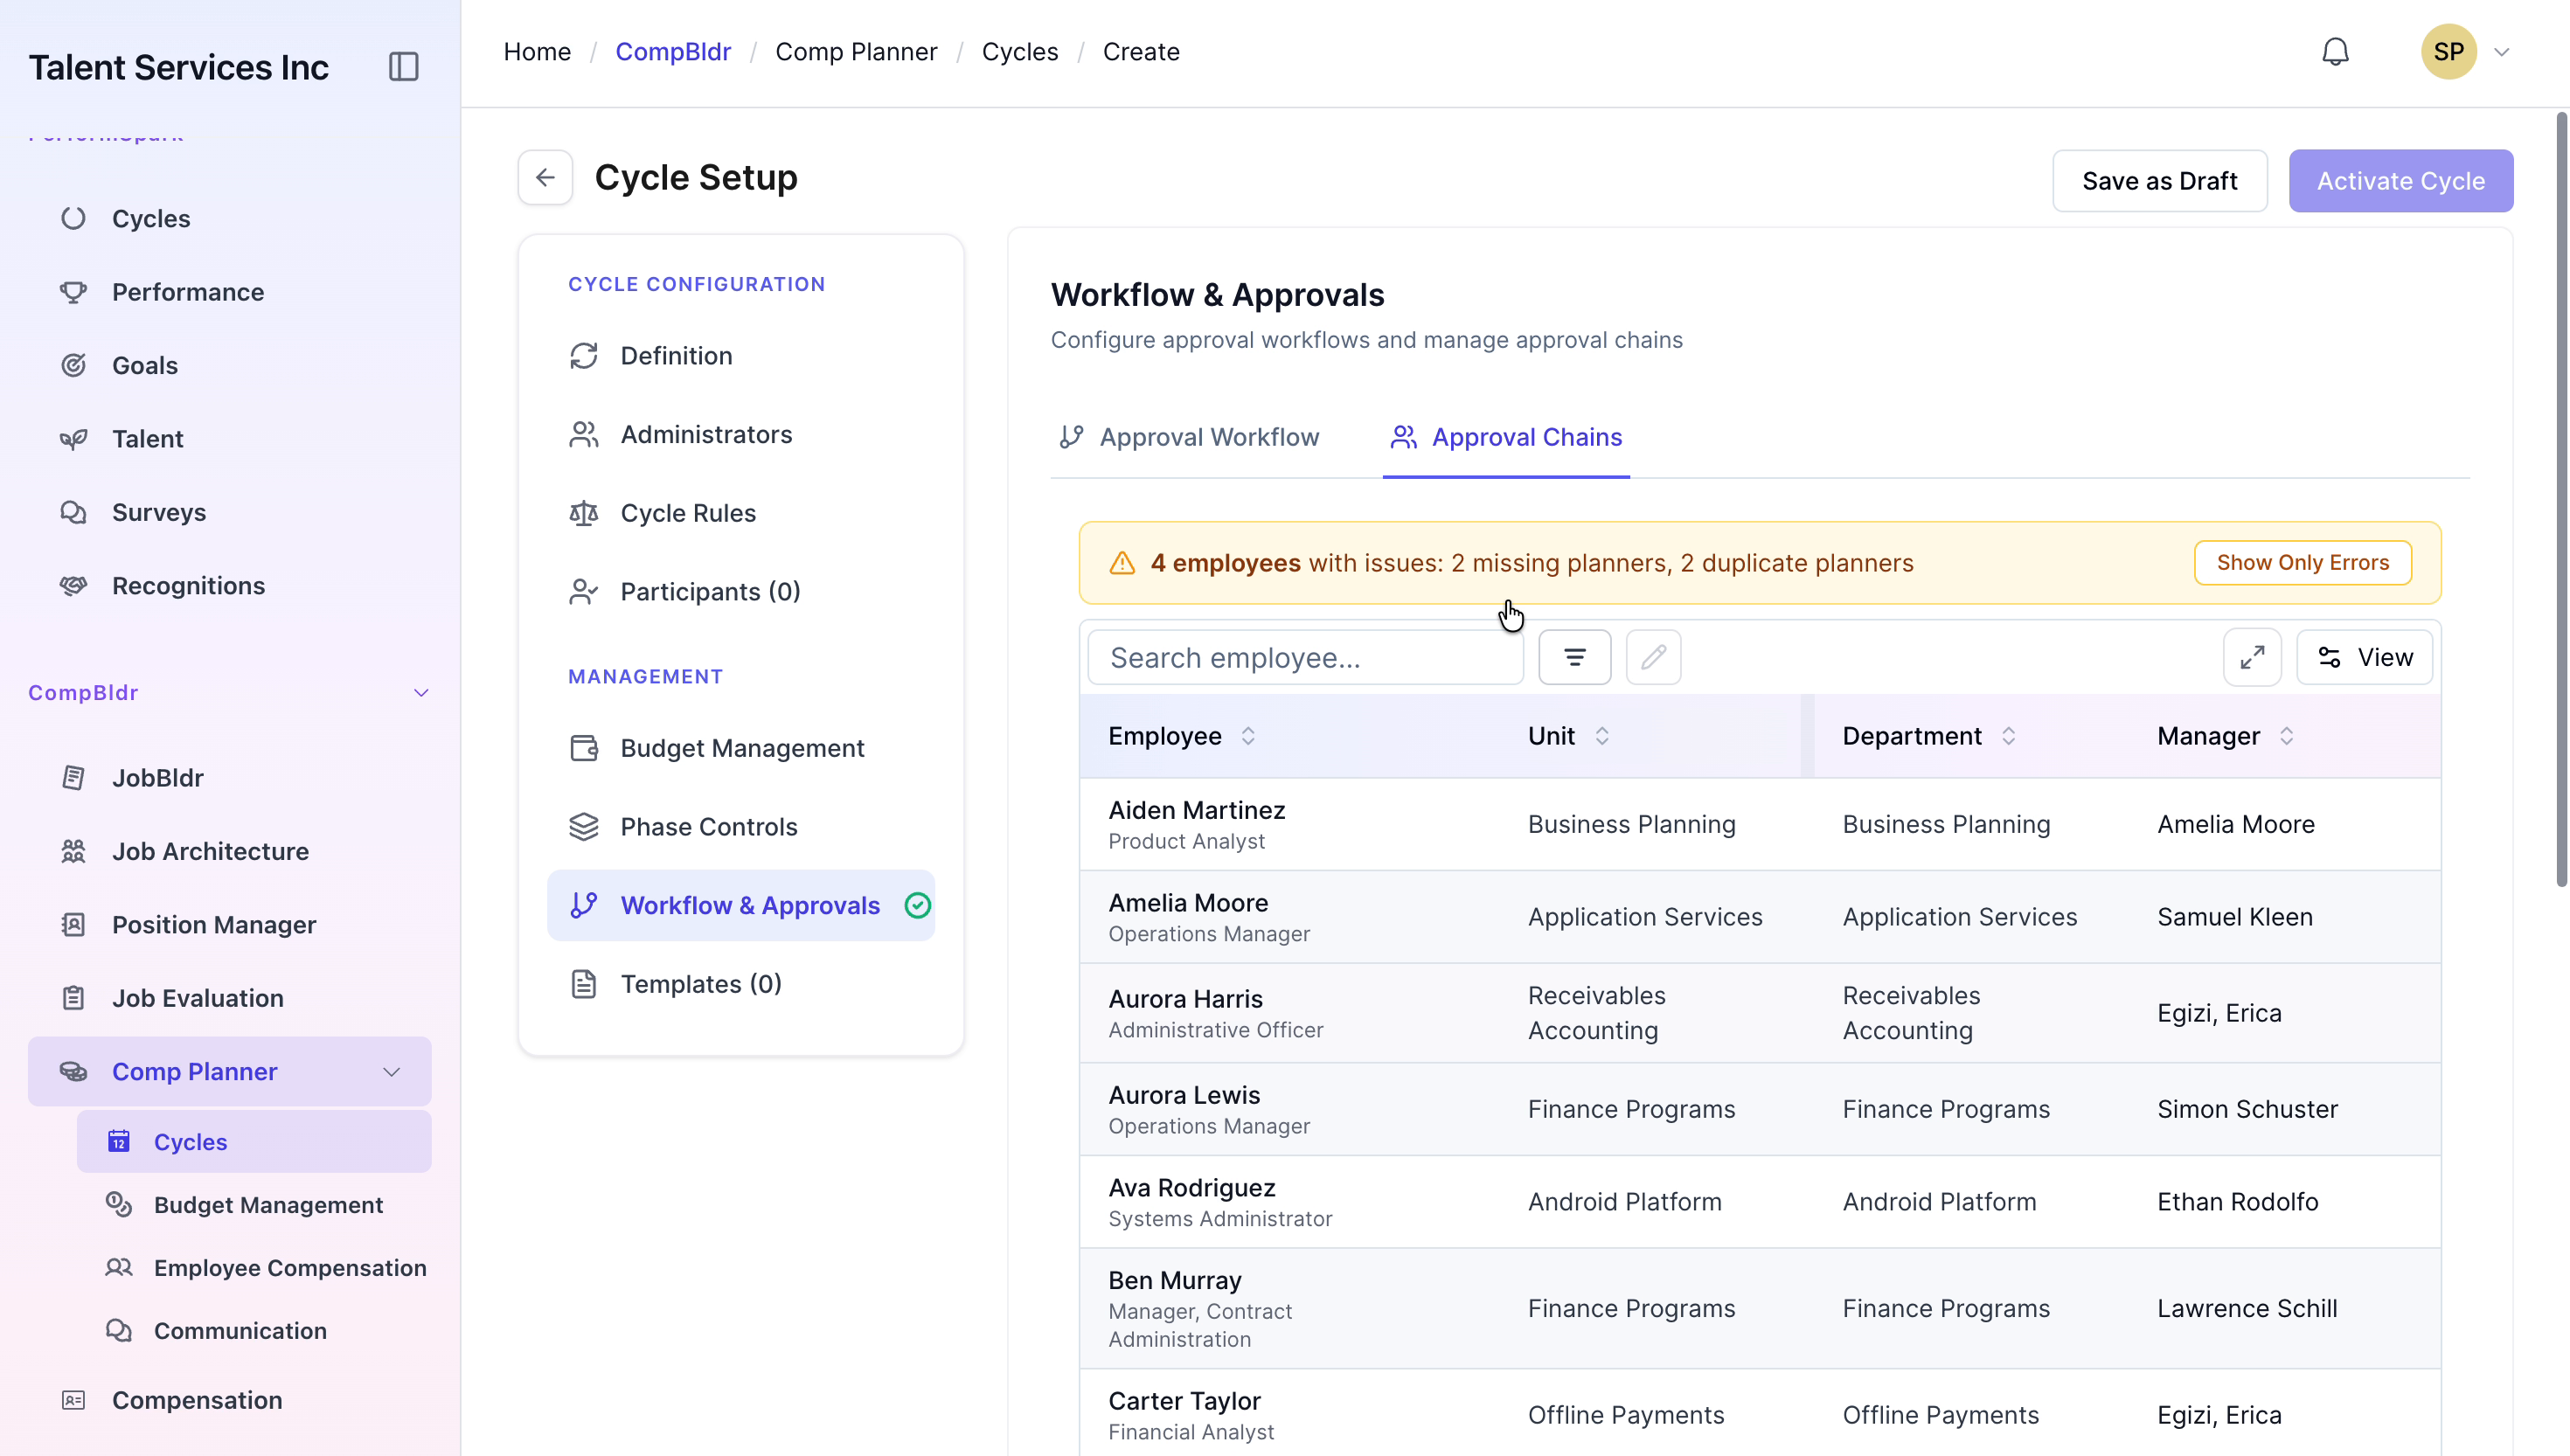
Step 4: Start a New Cycle Using the 3-Level Workflow
Navigate to the Cycles tab and start a new cycle. When prompted to choose a workflow, select the "3-level Workflow" you just created. After the cycle is created, open the Approval Chains tab within that cycle to review the mapped employees and confirm that each approval level (Manager, Team Head, Unit Head) has the correct approvers assigned.